iMac G3 500MHz: USB SSD Upgrade - Ditching the Failed IDE Bus for OS 9.2.2 & QuickTime 6
iMac G3 Specification:
Imac G3 500MHz RAM 128+512 = 640 MB IDE Bus Fail, Install Mac OS 9.2.2 on SSD USB Drive 128GB or Minimal 4GB USB drive.

iMac G3 running Mac OS 9.2.2 and QuickTime Player.
Download Mac OS 9.2.2
Download macos-922-uni.iso from https://www.macintoshrepository.org/1307-mac-os-9-2-2-universal-2002-edition-
Zip file name macos-922-uni.zip
and burn to CD or DVD disc with Low Speed require might be 4x

iMac G3: The USB SSD Connection Solution.

installation of Mac OS 9.2.2 on your iMac G3 using this hardware configuration likely proceeded as follows:
- Powering the Peripherals: The USB 3.0 hub provided sufficient power to run the external DVD drive, which is crucial for reading the installation CD.
- Connecting via the Hub: The USB hub allowed you to connect the necessary peripherals (DVD drive, mouse, keyboard, and potentially the target USB/SSD drive) to the iMac G3's limited USB 1.1 ports. While USB 3.0 devices will operate at USB 1.1 speeds on the G3, the hub provides the necessary connectivity.
- Booting from the DVD Drive: With the external DVD drive connected and powered, you were able to boot your iMac G3 from the Mac OS 9.2.2 installation CD in the external drive. This is typically done by holding down the "Option" (Alt) key during startup. This will bring up the Startup Manager, allowing you to select the external DVD drive as the boot device.
- Installation to USB/SSD: During the OS 9.2.2 installation process, you selected your connected USB or SSD drive (which was likely formatted as FAT32 with an Apple Partition Map beforehand) as the target destination. The OS 9 installer then reformatted the necessary partition on the USB/SSD drive to Mac OS Extended (HFS+) to install the system files.
- Booting from USB/SSD: After the installation was complete, you were able to boot your iMac G3 directly from the external USB or SSD drive, enjoying potentially faster performance compared to the original internal hard drive (especially with an SSD).
In summary, success relied on using a USB hub to overcome the iMac G3's limited USB port availability and potentially power constraints, allowing you to boot from an external DVD drive and install Mac OS 9.2.2 onto an external USB or SSD drive. The initial FAT32 formatting with an Apple Partition Map on the target drive likely facilitated its recognition by the iMac G3's firmware during the boot process.
Preparing an External SSD USB Drive for Mac OS 9.2.2 Installation on an iMac G3 (Successful Method):
- On a modern Mac (e.g., your MacBook Pro), connect the external USB drive.
- Open Disk Utility (Applications > Utilities) or Recommend first format USB drive as FAT32 on windows.
- Select the external drive in the sidebar.
- In the "Format" dropdown menu, choose MS-DOS (FAT) or FAT32.
- In the "Scheme/Partition Map" dropdown menu, choose Apple Partition Map.
- Click Erase.
- Name: Give the drive a name (e.g., "OS9Install").
- Click Erase and confirm the action.
- Connect the formatted USB drive to your iMac G3.
- Boot the iMac G3 from your Mac OS 9.2.2 installation media (e.g., a CD-R).
- Follow the on-screen instructions of the Mac OS 9.2.2 installer.
- During the installation process, you will be prompted to select a destination disk. Choose the prepared USB drive.
- The Mac OS 9.2.2 installer will then format the necessary partition on the USB drive as( Mac OS Extended (HFS+) or Mac OS Standard) and configure it with an Apple Partition Map to make it bootable.
- Complete the installation process.
Note:
Mac OS Standard (HFS) has a maximum volume size of 2 terabytes (2048 GB).
Mac OS Standard: Will work and support the capacity.
Mac OS Extended (HFS+): The generally recommended option as it's more modern, efficient, and doesn't have the 2TB individual file size limit.
Imac G3 500MHz RAM 128+512 = 640 MB IDE Bus Fail, Install Mac OS 9.2.2 on USB Drive 4GB .
- Successful Story Update: Minimum USB Drive Capacity for Bootable Mac OS 9.2.2 on iMac G3
- Based on your experience, after a full installation of Mac OS 9.2.2 onto an external USB drive, the total disk space used is less than 390MB.
- This means that even relatively small, older USB drives with capacities of 4GB or 8GB formatted as FAT32 (initially, for firmware recognition) and then formatted by the OS 9.2.2 installer as Mac OS Extended can comfortably accommodate a full and bootable installation of the operating system.
- This is excellent news because it makes the project more accessible, as users might have older, smaller USB drives readily available.
- Updated Steps (emphasizing USB drive capacity):
- Obtain a USB drive (4GB or larger is sufficient).
- On a modern Mac, format the USB drive as FAT32 with an Apple Partition Map.
- Connect the USB drive to your iMac G3.
- Boot from your Mac OS 9.2.2 installation media.
- Select the USB drive as the installation destination.
- The installer will format the USB drive (or a partition on it) as Mac OS Extended.
- Complete the installation.
Installation Quick Time Player 6.0 on Imac G3 (Power PC) Mac OS 9.2.2
Success! Installing QuickTime Player 6.0 on an iMac G3 (PowerPC) Running Mac OS 9.2.2
- Bringing modern (or at least more diverse) multimedia capabilities to a classic iMac G3 running Mac OS 9.2.2 can sometimes feel like a challenge. However, installing QuickTime Player 6.0 proved to be surprisingly straightforward using a direct file transfer method. Here's how it was done:
- The Key File: The crucial element was locating the QuickTime_Installer.smi_.bin file online https://www.macintoshrepository.org/2473-quicktime-6-0-3 . This specific compressed archive seemed to be the magic ticket for a direct installation.

- Transfer via USB: Using a modern MacBook Pro, the QuickTime_Installer.smi_.bin file was copied to a standard USB drive.
- Connecting to the Classic: The USB drive was then connected to the iMac G3 running Mac OS 9.2.2.
- Initiating Installation: A simple double-click on the QuickTime_Installer.smi_.bin file on the iMac G3 triggered a decompression process, placing QuickTime_Installer.smi on the desktop.
- Running the Installer: Another double-click on the newly created QuickTime_Installer.smi file launched the familiar QuickTime 6 installation wizard.
- Basic or Pro? No Problem! The installer offered a choice between Basic and Pro versions. Interestingly, the registration screen for both versions could be easily bypassed. Simply entering a name and clicking "Continue" allowed the installation to proceed without needing a registration key.
- Final Step: Restart: After the installation completed, a restart of the iMac G3 running Mac OS 9.2.2 was performed to finalize the integration of QuickTime Player 6.0.
- The Result: QuickTime Player 6.0 was successfully installed and ready to play a wider range of multimedia formats on the classic iMac G3, all without the complexities of disk image mounting or the need for a registration key for basic functionality. This direct file and installation method offers a surprisingly smooth way to enhance the multimedia capabilities of these vintage machines.
Convert mp4 to Mpeg for Quick Time Player 6.0 on Imac G3 (Power PC) Mac OS 9.2.2
Successful Solution:
- Use the online video conversion tool Convertio (https://convertio.co/mp4-mpeg/) on a modern computer (like a MacBook Pro).
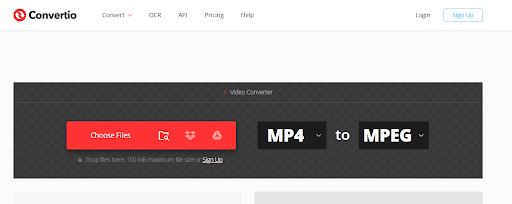
- Upload the MP4 video file to Convertio.
- Choose the output format as MPEG (.mpg). (Note: The specific MPEG encoding settings within Convertio that lead to compatibility with QuickTime 6 on OS 9.2.2 seem to work by default, even though the resulting file size may be significantly larger.)
- Download the converted .mpg file.
- Transfer the .mpg file to the iMac G3 using a USB drive.
- Open the .mpg file with QuickTime Player 6 on macOS 9.2.2.
Key Observation: While the conversion to MPEG using Convertio resulted in a much larger file size (e.g., a 7MB MP4 became a 23GB MPG), the resulting .mpg file was successfully playable in QuickTime Player 6 on the iMac G3 without requiring any additional codecs or complex installation procedures.
Lesson Learned: Online conversion tools can sometimes provide a straightforward way to bridge compatibility gaps between modern video formats and older media players, even if it comes at the cost of increased file size.


