Capturing iMac G3 (Mac OS 9.2) Screen with OBS Studio and VGA Adapter: A Complete Guide
Why Capture Your Classic iMac G3?
In an era dominated by sleek, modern devices and cloud computing, you might wonder: why bother capturing the screen of a decades-old computer like the iMac G3? The reasons are as varied and vibrant as the translucent plastics of the G3 itself! This guide isn't just about technical know-how; it's about preserving a piece of computing history and unlocking a realm of retro fun.
Here are a few compelling reasons to dust off your iMac G3 and start capturing its screen:
- Nostalgia and Retro Computing Revival: For many, the iMac G3 and its iconic Mac OS 9.2 operating system represent a golden age of personal computing. Capturing its screen allows us to revisit cherished memories, explore classic software, and relive the unique user experience of a bygone era. It's about more than just old tech; it's about experiencing the past.
- Digital Preservation: Classic operating systems, applications, and even old websites running on these machines are quickly becoming digital artifacts. By capturing their screen, you're helping to preserve a visual record of how computing used to be. This is invaluable for educational purposes, historical documentation, or simply ensuring these digital experiences aren't lost forever.
- Content Creation for Retro Enthusiasts: The retro computing community is thriving! Whether you want to create YouTube videos, share screenshots on social media, or write articles about vintage software, capturing your iMac G3's output provides authentic, high-quality material. Your unique content can connect with a passionate audience eager to see these machines in action.
- Troubleshooting and Documentation: For fellow retro enthusiasts who might be struggling to get their old Macs working, a captured screen recording can serve as an invaluable visual guide. You can document specific software installations, system configurations, or even showcase bug fixes in a clear, reproducible format.
- Pure Fun and Experimentation: Sometimes, the best reason is simply the joy of it. Experimenting with vintage hardware and software, and then sharing those experiences, can be incredibly rewarding. Capturing your G3's screen transforms a personal hobby into shareable content.
By the end of this guide, you'll have the knowledge and tools to bring your iMac G3's vibrant Mac OS 9.2 world onto your modern setup, ready for sharing, preserving, or simply enjoying in a new light. Let's begin!
Preparing for Your Retro Capture
Before we dive into the technical wizardry of connecting your vintage iMac G3 to a modern capture setup, a little preparation goes a long way.
Essential Gear: Preparing for Your Retro Capture
Before we dive into the technical wizardry of connecting your vintage iMac G3 to a modern capture setup, a little preparation goes a long way. This ensures a smoother, frustration-free capturing experience and is your pre-flight checklist for a journey back in time. Having all the necessary components ready and understanding their role will ensure a successful and high-quality screen capture.
Here's what you'll need:
1. VGA to USB Capture Adapter: This crucial device takes the VGA video output from the back of your iMac G3 and converts it into a digital signal that your modern computer can understand via a USB port.
(Optional addition: Briefly mention common adapter types, e.g., "often labeled as VGA Capture HD 1080P" or "USB Video Grabber")
2. 3.5mm Male-to-Male Audio Cable: One end of this cable connects to the stereo sound output (headphone jack) of your iMac G3. The other end connects to your computer's "line-in" port or to an external sound mixer before going into your computer's input.
3. OBS Studio (Open Broadcaster Software): Ensure you have OBS Studio already downloaded and installed on your modern computer. This powerful, free software will be used to record or live stream the screen video and audio from your iMac G3.
Think of this as your pre-flight checklist for a journey back in time. Having all the necessary components ready and understanding their role will ensure a smoother, frustration-free capturing experience. This section will walk you through every piece of essential gear you'll need, from the classic hardware itself to the crucial cables and software that bridge the gap between retro and modern technology. Getting this right is the foundation of a successful and high-quality screen capture.
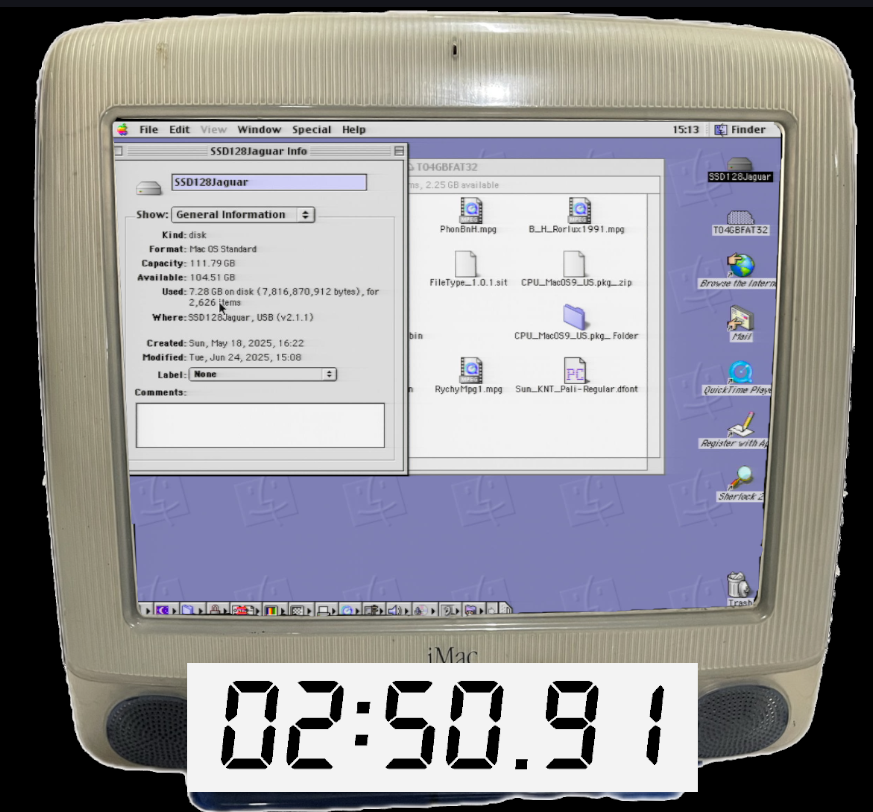
The Star: Your iMac G3 with Mac OS 9.2
At the heart of our retro computing adventure is the iconic iMac G3 – a machine that needs little introduction to anyone familiar with Apple's revolutionary designs. Launched in a vibrant array of "flavors" and featuring its distinctive translucent, all-in-one design, the iMac G3 wasn't just a computer; it was a cultural phenomenon that marked a pivotal return to form for Apple.
For this specific screen capture project, the iMac G3 is running Mac OS 9.2. This operating system, often hailed as the "classic" Mac OS's pinnacle, offers a uniquely charming and functional user experience that predates Apple's move to the Unix-based OS X (now macOS). Navigating its desktop, launching applications like QuickTime Player 6, and interacting with its intuitive interface offers a delightful journey back to the late 90s and early 2000s.
Key considerations for your iMac G3:
- VGA Output: Crucially for this project, the iMac G3 models typically feature a VGA output port at the rear. This port allows the video signal from the internal display to be mirrored or extended to an external monitor, which in our case, will be our capture device. Ensure this port is functional on your specific G3 model.
- System Stability: While Mac OS 9.2 is generally robust, ensuring your iMac G3 is running smoothly will lead to the best capture results. Minimize background applications and ensure the system is stable before initiating any recording sessions.
- Visual Appeal: The vibrant colors and distinct interface elements of Mac OS 9.2 make for fantastic captured content. Ensure your iMac G3's screen settings (resolution, color depth) are optimized for clarity if you plan to adjust them within Mac OS 9.2 itself.
This segment highlights the core hardware and software you'll be working with, setting the stage for the technical connections that follow.
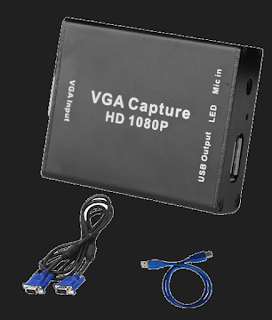
The Bridge: VGA Capture Adapter (e.g., VGA Capture HD 1080P)
While your iMac G3 is a magnificent machine, its analog VGA video output isn't directly compatible with the digital USB inputs of modern computers. This is where the VGA Capture Adapter comes in – acting as the essential "bridge" between your vintage Mac and your contemporary recording setup.
This compact device performs a vital function: it takes the analog video signal from your iMac G3's VGA port and converts it into a digital format that can be transmitted over a USB cable to your recording computer. Essentially, it allows your modern PC or Mac to "see" and interpret the display output of your classic iMac.
What to look for in a VGA Capture Adapter:
- VGA Input: Naturally, the adapter must have a VGA input port to connect to your iMac G3.
- USB Output: It should feature a USB output (commonly USB 2.0 or USB 3.0) to plug into your recording computer. USB 2.0 is often sufficient for older VGA resolutions.
- Resolution Support: Look for adapters that support resolutions commonly output by the iMac G3. As seen in the specifications of many such adapters, they often support a range from 640x480 up to 1920x1080, 1600x1200, or higher. This ensures compatibility with Mac OS 9.2's display settings.
- Frame Rate: An adjustable frame rate, typically 5-60 frames per second, is desirable for smooth video capture.
- Audio and Video Standards: Many adapters support standard UVC/UAC (USB Video/Audio Class), which means they are "plug and play" and generally do not require special drivers for most modern operating systems. This significantly simplifies the setup process.
Power Source: Most VGA to USB adapters are bus-powered via the USB connection, meaning they don't require an external power supply, adding to their convenience.
When choosing your adapter, ensuring it aligns with these specifications will provide the best possible connection and capture quality from your beloved iMac G3.
The Recorder: OBS Studio (Open Broadcaster Software)
Now that we have our iMac G3 connected to our modern computer via the VGA capture adapter, we need a way to actually record or stream the video signal. This is where OBS Studio (Open Broadcaster Software) shines.
OBS Studio is a free, open-source, and incredibly powerful software suite designed for video recording and live streaming. It's the industry standard for content creators, gamers, and anyone needing to capture or broadcast video from various sources, including external capture devices like the one we're using.
Why OBS Studio is perfect for capturing your iMac G3:
- Free and Open Source: The fact that OBS Studio is completely free means you can achieve professional-quality screen capture without any financial investment. Its open-source nature also means it's constantly being updated and improved by a large community of developers.
- Versatile Input Sources: OBS Studio is designed to handle a wide range of input sources. It seamlessly integrates with our VGA capture adapter, allowing you to easily select it as a "Video Capture Device" within the software.
- Real-time Monitoring and Control: OBS Studio provides a real-time preview of your captured iMac G3 screen, allowing you to adjust settings, resolution, and audio levels on the fly.
- Powerful Recording Options: You have full control over recording resolution, frame rate, output format (MP4, MOV, etc.), and bitrate. This ensures you can capture your iMac G3's screen in the highest possible quality.
- Audio Capture and Mixing: OBS Studio allows you to capture audio from multiple sources, including the audio from your iMac G3 (if you've connected it). You can also mix audio from your computer's microphone, making it ideal for adding commentary or narration to your recordings.
- Scene-Based System: OBS Studio uses a "scene" system, allowing you to easily switch between different layouts and sources. While not essential for basic capture, this can be useful if you plan to create more complex video productions.
- Cross-Platform Compatibility: OBS Studio is available for Windows, macOS, and Linux, ensuring you can use it regardless of your modern computer's operating system.
In the following sections, we'll guide you through the specific steps of configuring OBS Studio to capture the output from your iMac G3, allowing you to preserve and share the magic of classic Mac OS 9.2 with the world.
Connectivity: VGA Cable, Audio Cables, USB Port
With our core components identified – the iMac G3 as the source, the VGA capture adapter as the bridge, and OBS Studio as the recorder – the next crucial step is establishing the physical connections. This involves ensuring you have the right cables and understanding where each one plugs in.
Here's a breakdown of the essential connectivity you'll need:
VGA Cable:
- Purpose: This cable is responsible for transmitting the analog video signal from your iMac G3's display output to the VGA capture adapter. It's the primary visual link.
- Connection: One end of the VGA cable plugs directly into the VGA output port located at the back of your iMac G3. The other end connects to the VGA input port on your capture adapter. Ensure both connections are secure, sometimes requiring the screws on the VGA connectors to be tightened.
Audio Cables (3.5mm Male-to-Male):
- Purpose: While the VGA cable handles video, it does not transmit audio. To capture the iconic sounds, chimes, and application audio from your Mac OS 9.2 environment, you'll need a separate audio cable.
- Connection: One end of a standard 3.5mm male-to-male audio cable plugs into the headphone/audio out jack on your iMac G3. The other end will typically plug into the "Line In" port (often blue) on the sound card of your modern recording computer. If you're using an external audio mixer or interface, you would route the iMac G3's audio output through that device before it reaches your computer's input.
USB Port (on the Capture Adapter and Modern Computer):
- Purpose: The USB port on your VGA capture adapter is the digital highway for the converted video (and sometimes integrated audio) signal to reach your modern recording computer.
- Connection: Plug one end of a USB cable (often supplied with the capture adapter) into the USB output port on the VGA capture adapter. The other end plugs into an available USB port (USB 2.0 or 3.0) on your modern computer. This connection powers the adapter and carries the digitized video/audio data that OBS Studio will then process.
By correctly connecting these cables, you'll create a seamless pathway for your iMac G3's audiovisual output to be recognized and recorded by your modern computer, setting the stage for capturing its retro magic.
Modern PC/Mac for OBS
While our focus is undoubtedly on the charming retro glory of the iMac G3 and Mac OS 9.2, it's crucial to remember that a powerful modern computer serves as the recording studio. This PC or Mac is where OBS Studio runs, processing the video and audio data streamed from your VGA capture adapter.
Even though the source material (the iMac G3's output) might be low-resolution by modern standards, capturing and encoding video in real-time can still be demanding on your computer's resources. OBS Studio, while efficient, benefits greatly from a capable machine.
Key considerations for your Modern PC/Mac:
- Processor (CPU): A multi-core processor (Intel Core i5/i7/i9 or AMD Ryzen 5/7/9 equivalent) from recent generations is highly recommended. This ensures smooth encoding of your video without dropping frames, especially if you plan to record at higher resolutions or frame rates supported by the capture card (e.g., 1080p at 60fps).
- Memory (RAM): 8GB of RAM is generally the minimum, with 16GB or more being ideal. Sufficient RAM helps OBS Studio run efficiently, especially when handling multiple sources or longer recording sessions.
- Storage: A fast storage drive, like an SSD (Solid State Drive), is highly beneficial for saving your recorded video files. HDDs (Hard Disk Drives) can work, but SSDs reduce the chance of recording bottlenecks. Ensure you have ample free space for your video recordings, as uncompressed or high-quality video files can be very large.
- Operating System: OBS Studio is compatible with Windows (Windows 10/11), macOS (Monterey or newer), and Linux. Ensure your operating system is up-to-date for the best compatibility and performance.
- USB Ports: Your modern computer will need an available USB port (preferably USB 3.0, though USB 2.0 can work for most VGA capture scenarios) to connect the VGA capture adapter.
- Audio Input (Line-In): As discussed, if you're capturing audio separately from your iMac G3, your modern PC will need a "Line-In" audio input port (often a blue 3.5mm jack). Alternatively, an external audio interface or mixer can be used to route the audio into your computer.
By ensuring your modern PC or Mac meets these specifications, you'll provide OBS Studio with the power it needs to flawlessly capture every pixel and sound from your classic iMac G3, bringing its retro charm into the digital age.